Optical Size
Learn how to create a fast and cheap optical size axis using avar2.
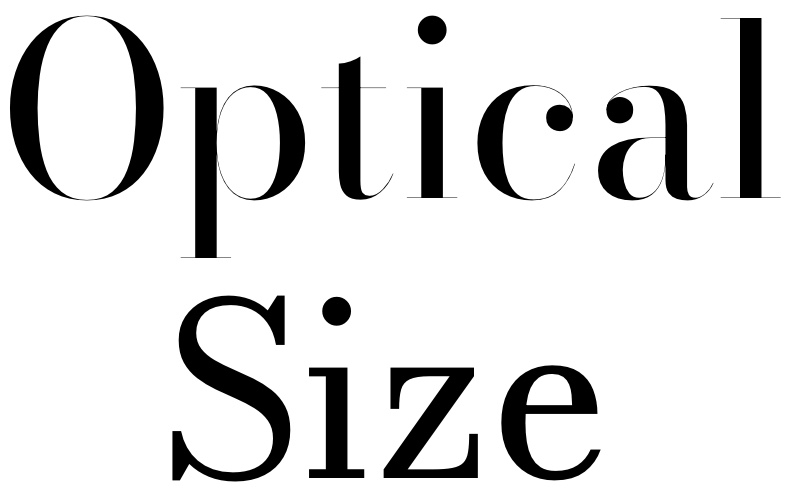
Both words use the same font—Bodoni Moda. The top word has an optical size value of 96, while the bottom word has a value of 6.
One of the most important changes you can make to a font is its size. While less common today, type designers employed size-specific adjustments for metal type. When designing and punch cutting the metal type, refining the design for a different size was inherent to the process and free, so to speak. Later technologies like the Benton Pantograph allowed type designers to tweak the width, weight, and stroke of a font that originated from a single master to create optical sizes.
Depending on the approach, adding an optical size or opsz axis may multiply the amount of work for type designers. For example, the traditional Multiple Master approach requires 81 masters1 for width, weight, and optical size. In variable fonts, you can use fewer masters if you are willing to interpolate areas of your designspace. For example, the variable font approach allows designing the bold and condensed masters and interpolating the deltas together for the condensed bold instance, without having to draw it. However, some type designers prefer to design the corners of the designspace for more control.
Avar2 “Cheap” Optical Size
Similar to interpolating parts of the designspace, you can shortcut designing the optical size axis for sans serif fonts by using avar2. With avar2, you can map the optical size axis to control the weight and width axes. For example, you can make larger optical sizes lighter and more condensed, while you can make smaller optical sizes look bolder and more expanded. This method works best for fonts with low to no contrast.
Here is an example avar2 mapping for a virtual optical size axis:
<?xml version='1.0' encoding='UTF-8'?>
<designspace format="5.2">
  <axes>
    <axis tag="wght" name="Weight" minimum="1" maximum="1000" default="400"/>
    <axis tag="wdth" name="Width" minimum="50" maximum="150" default="100"/>
    <axis tag="opsz" name="Optical size" minimum="6" maximum="144" default="16"/>
    <mappings>
      <mapping>
        <input>
          <dimension name="Optical size" xvalue="6"/>
          <dimension name="Weight" xvalue="400"/>
          <dimension name="Width" xvalue="100"/>
        </input>
        <output>
          <dimension name="Weight" xvalue="500"/>
          <dimension name="Width" xvalue="115"/>
        </output>
      </mapping>
      <mapping>
        <input>
          <dimension name="Optical size" xvalue="144"/>
          <dimension name="Weight" xvalue="400"/>
          <dimension name="Width" xvalue="100"/>
        </input>
        <output>
          <dimension name="Weight" xvalue="300"/>
          <dimension name="Width" xvalue="85"/>
        </output>
      </mapping>
    </mappings>
  </axes>
</designspace>
Depending on your type design app, you may need a custom script to fix2 the optical size bounds. Finally, the Python3 library fontTools can merge3 your designspace definitions into your font with a post-build script, if your type design app does not yet support avar2.
True Optical Size
For learning more about optical size, the best option is to read Tim Ahren’s Size-specific Adjustments to Type Designs book4. True optical size has more refinements than just width and weight, especially for serif fonts. Or, if you prefer a high-level overview, Simon’s “Measuring Optical Sizes” article5 summarizes and compares the attributes across open-source fonts.
Parametric fonts can also use avar2 to map their internal axes to an optical size axis, giving a higher quality result with fewer masters.